CMSIS-DAP Tools
- Disambiguating CMSIS-DAP and JTAG / SWD
- CMSIS-DAP Devices
- Connecting CMSIS-DAP Tools to Circuits
- CMSIS-DAP Software Utilities
Disambiguating CMSIS-DAP and JTAG / SWD
We’re throwing a lot of acronyms around here, I know. These three especially can be confusing since they show up together in the same context:
JTAG is the joint test action group - a committee of electronics manufacturers who got together and decided that their devices should all program (and debug) with the same interface a while back (the 90s). They developed a protocol, JTAG, that is standard for many microcontrollers, most importantly the ARM cores we use all over the place.
SWD is serial wire debug: a two-pin variant of the JTAG protocol. Don’t ask me for the details, AFAIK they’re logically the same but the data link layer is different. This is most common on newer ARM chips, and the pinout we find most often is here:
CMSIS-DAP is the programming device firmware that runs on the programming device (the things we describe here) and communicates on one side over USB to your PC (where you are compiling code / finding .bin prebuilt binaries), and on the other side over TTL (meaning, over simple physical pins) to the microcontroller. In the drawing below, debugger can also mean any programming software (like platform.io, microchip studio, or any of the softwares described below).
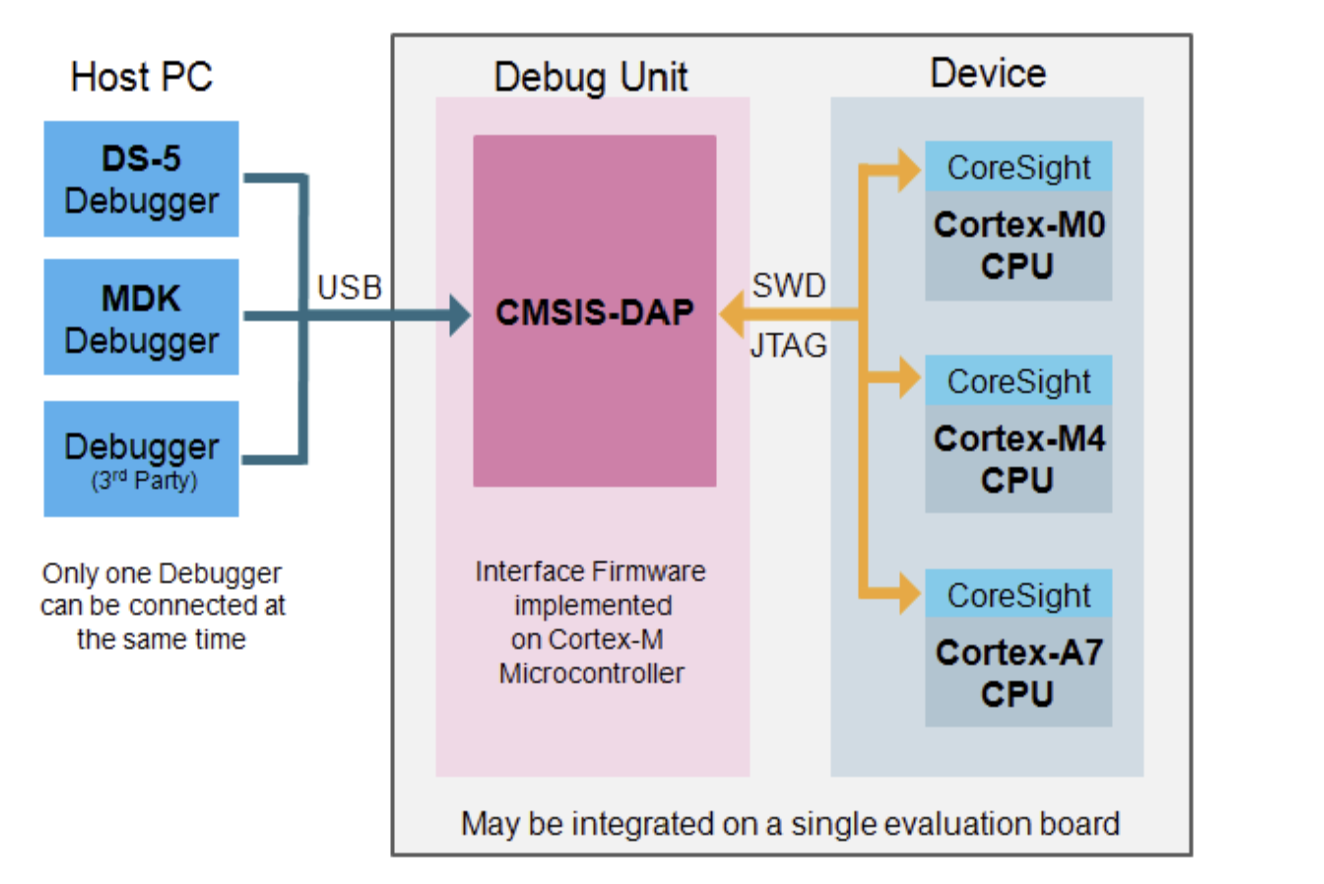
So, we refer to any device (programmer) that can write programs into a microcontroller’s memory using JTAG or SWD as a CMSIS-DAP device. For more disambiguation on all this, here’s a stackexchange post: clearly the topic is a tiny can of worms.
CMSIS-DAP Devices
There are a number of these available:
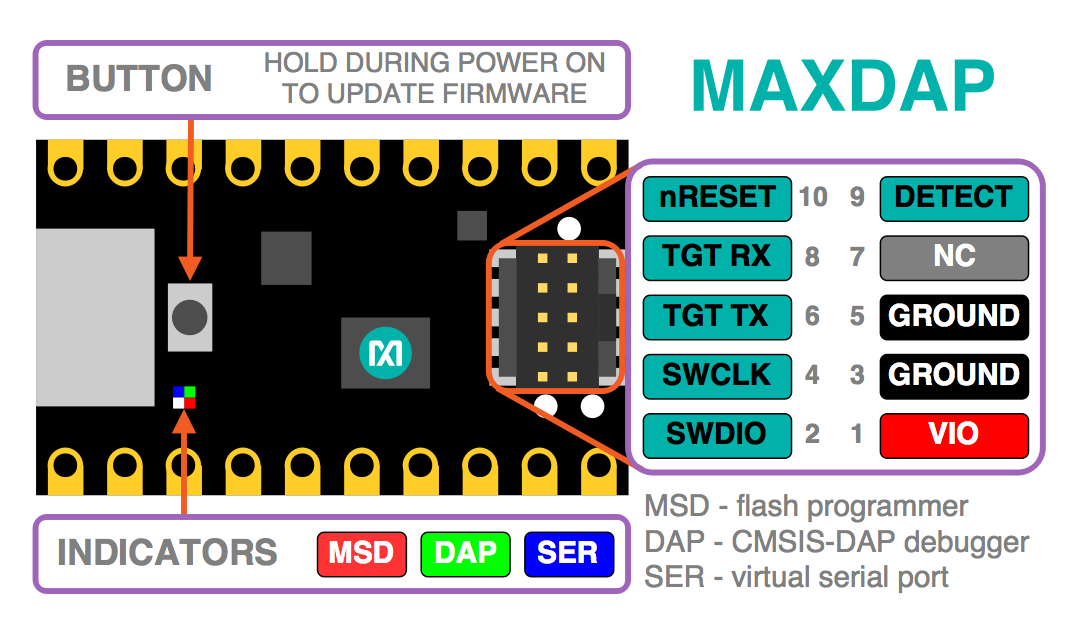
MAX32625 Pico MAXDAP
This is a development board for the MAX32625 microcontroller that comes out-of-the-box with the CMSIS-DAP firmware loaded, meaning it is also a very cheap programmer.
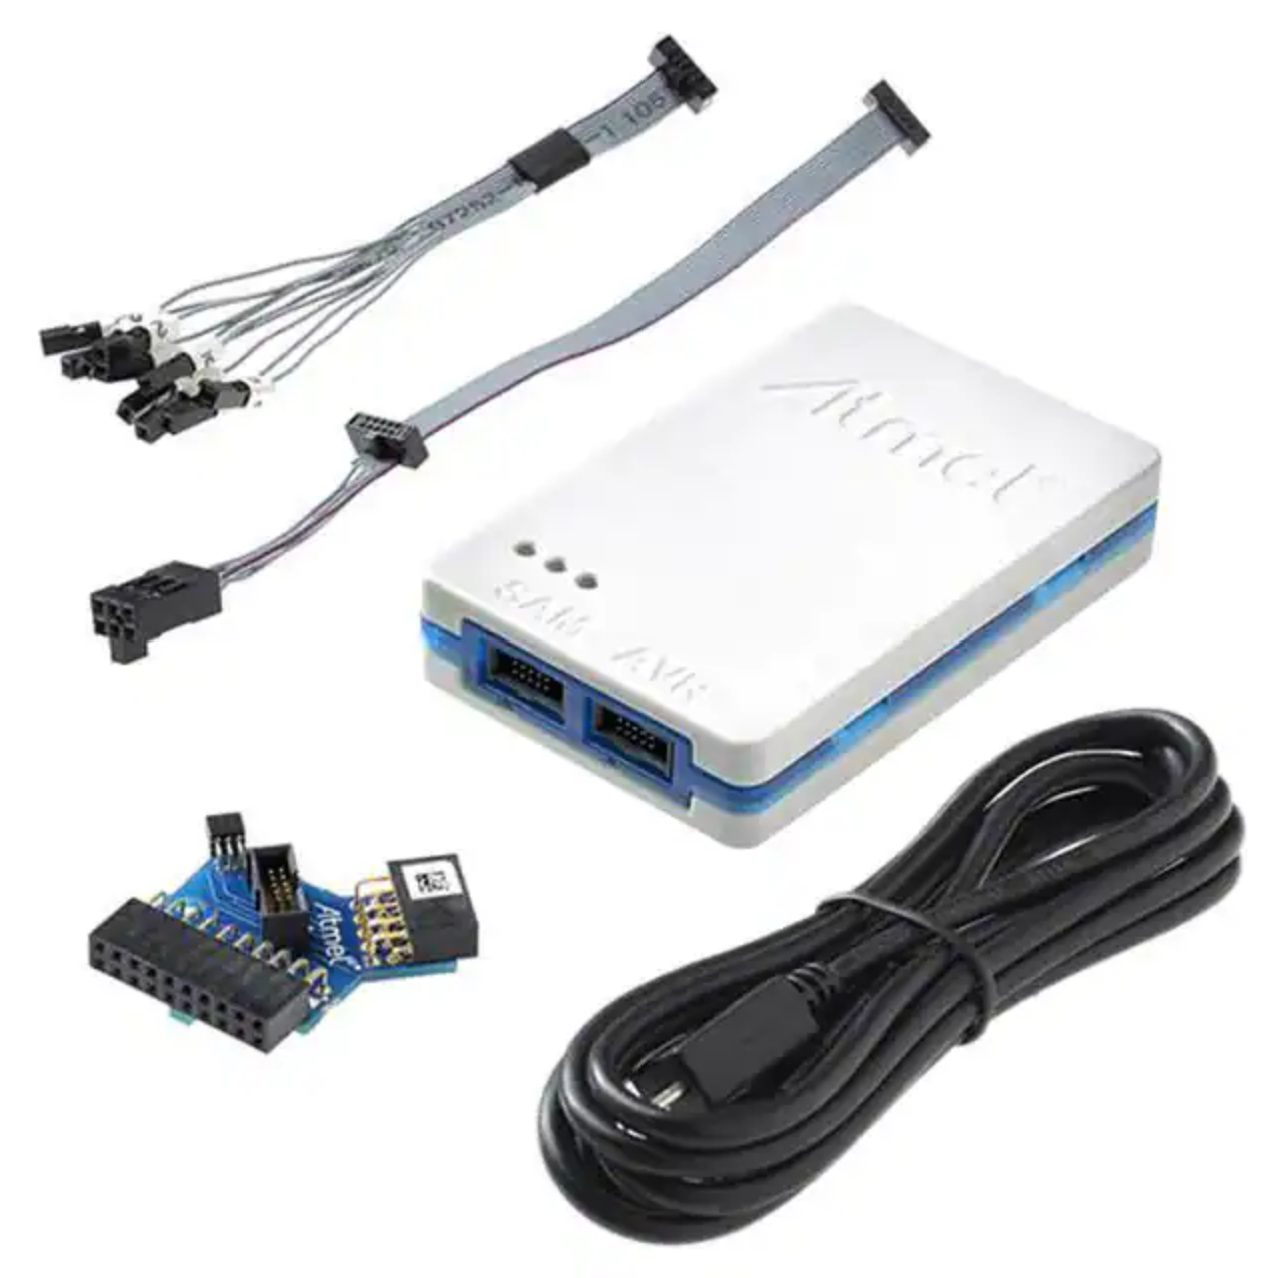
Atmel-ICE
This is a (more expensive) CMSIS-DAP device that can also program AVR targets over ISP or PDI. Keep in mind that the ICE has two ports: one labelled “AVR” and the other “SAM” - it’s the second one that we use when we program over JTAG or SWD.
Fab (Free) DAP
We can also build our own CMSIS-DAP capable device, design files for which are located on Neil’s class page (ctrl + f for “Free-DAP”).
If you’re familiar with the fab class circuit building routine, you can use this png to mill traces and this png to mill the outline, then stuff the board according to this drawing:
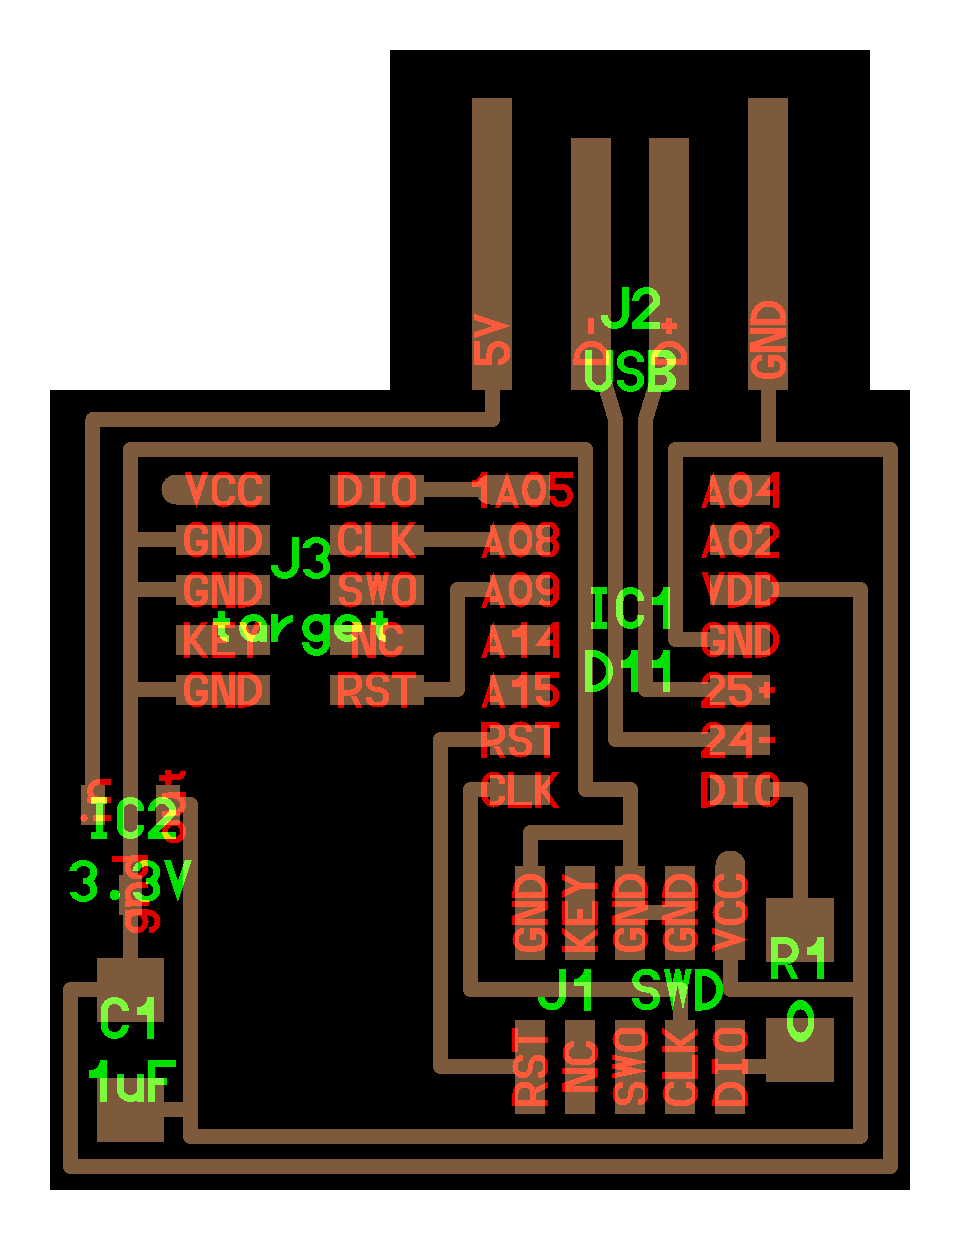
The board has two 2x5 0.05” pin headers: the one on the left is used when it is a programmer and the one on the bottom is used when it is being programmed - here we have to program the programmer (turning the circuit from a dead ATSAMD11C board into a CMSIS-DAP device) using this .bin binary. To bootstrap, borrow a friend’s CMSIS-DAP device, or use the Atmel-ICE we stock in lab, etc.
Firmware for this board is on Alex Taradov’s Free-Dap project, thanks Alex!
Connecting CMSIS-DAP Tools to Circuits
For any of these to work, we need to have:
- the cmsis-dap tool connected to your computer, via usb
- the cmsis-dap tool connected to your microcontroller, via the
swdpinout above- make sure to watch orientation! there are two possible with this pinout
- inserting the wrong orientation won’t brick your board or short anything out, so just test it in both states if you’re unsure
- the microcontroller / circuit needs power supplied seperately: the cmsis-dap tools detect power to ensure the target micro is alive, but they don’t supply it !
Some pinouts can be different than the standard 2x5 pin header seen above. If you encounter one of these, you’ll have to read and understand both, and then make a network of jumper wires (or a second circuit board) to ‘translate’ between the two pinouts. I recommend simply using the 2x5 pin header, it’s become a fairly standard issue spec for ARM microcontrollers.
CMSIS-DAP Software Utilities
In order to actually put these to use, we need some software on our computer. Since we wanted to include setup notes (and common pitfalls / errors) for each of these, we keep one page per. They’re in the nav bar to the left, and here: